

Prerequisites
- Codex Desktop installed
- CC Switch installed —Switch download
- An A2Agent API key — sign up at a2agent.me/register to get one
Setup
1
Add a Provider
Open CC Switch, switch to the Codex tab at the top, and click the orange 「+」 in the top-right corner.On the Add New Provider page, keep Codex as the provider and click Custom Configuration in the top-left corner.
2
Fill in the Provider Information
-
Provider Name:Custom, e.g.
A2Agent-Codex. - API Key:Your A2Agent API key.
-
API Base URL:https://api.a2agent.me/v1 (OpenAI Responses-compatible endpoint; must end with
/v1).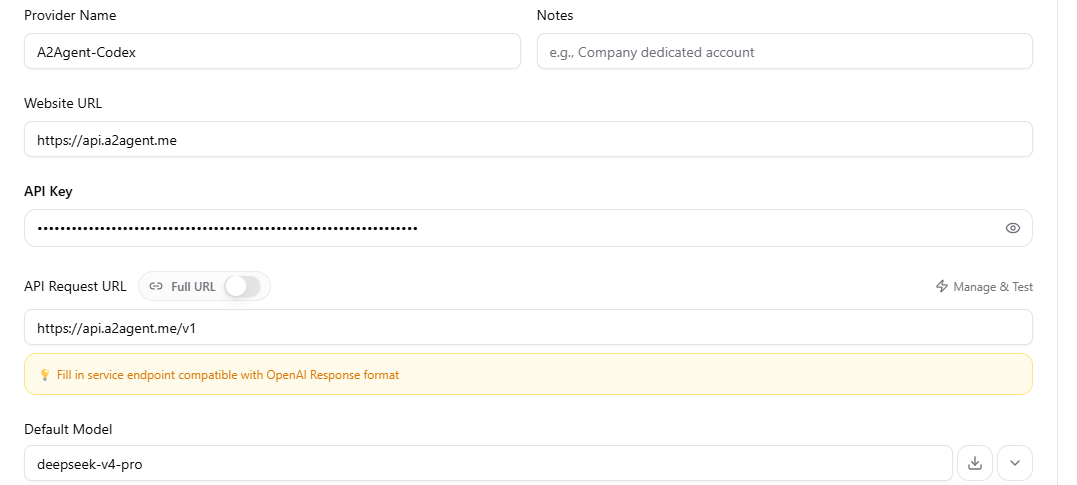
-
Default Model:Click the download button on the right to fetch a2agent Models, then choose the model you want, e.g:
deepseek-v4-pro.
-
Advanced Options:To switch models when using Codex, configure model mapping in Advanced Options, select “Chat Completions” as the Upstream Format , and then click Add Model after fetching the model list.

3
Configure config.toml (TOML)
Write the following configuration to the Codex config file:When finished, click 「 + Add 」 in the bottom-right corner.
4
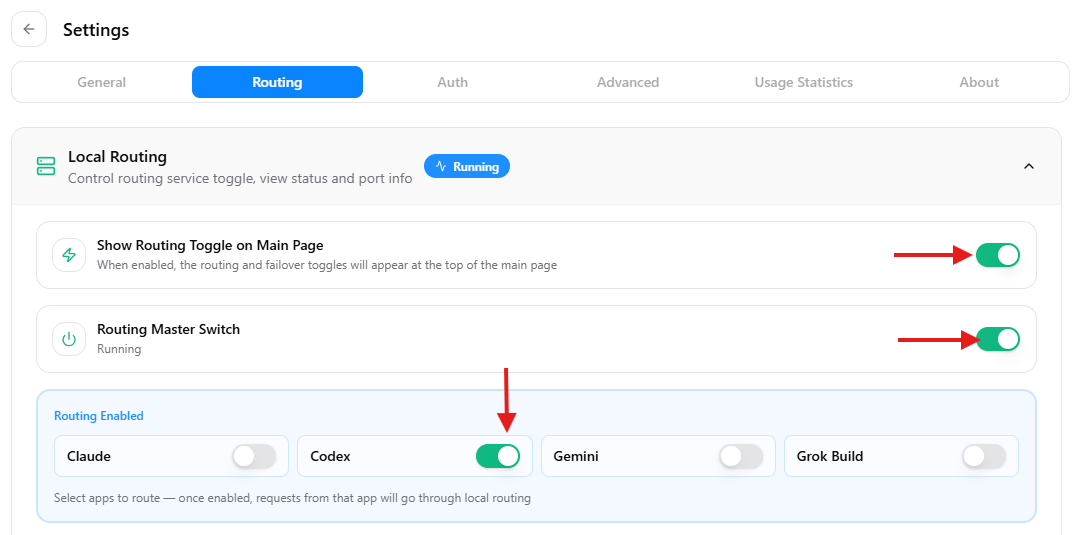
Enable Routing
- Click Settings in the top-left corner → Routing → Local Routing.
- Turn on Show the local routing switch on the main page.
- Turn on the Routing master switch.
5
Enable the Provider Channel
- Return to the provider list and click Enable on the A2Agent-Codex card.
- When the button shows In Use, the provider has been enabled.